In my previous article I gave you an overview of Azure Functions and discussed about the benefits of the Azure Functions. With this session I will cover you with necessary steps to create an initial basic functions app.
Getting Started:
Login to Azure Portal, you will see Function Apps section in the left menu. This is where all your Function Apps will be listed, once you login.


Let us start by creating a new Function app. Type Functions

Select Function App from Web + Mobile category, and Click on Create Button.
Fill In details:
- App Name,
- Select Subscription
- Select Resource Group (new if you want to create new resource group) or select existing
- Select Hosting Plan
- Specify Storage
- Click on Create


You will see deployment in progress message.


Once you explore further selecting the Function App instance you will be able view the URL and left side menu you will see the options to configure:
- Functions
- Proxies (Preview Feature)
- Slots (Preview Feature)

Getting Started – create first Function App
Now since we have new instance ready. Let us create our first Function.
We have to choose by :
1.) Choose a scenario:
- Webhook + API
- Time
- Data Processing
2.) Choose a language:
- JavaScript
- CSharp
- FSharp
- For PowerShell, Python and Batch processing, you create your own custom function

For the demo sake I am creating a Timer Scenario and selected CSharp as the language.

I created a simple trigger code and Click on Save and Run

Job has completed within speculated delay we put through on the Thread.Sleep:

Code Sample:
using System;
using System.Threading;

public static void Run(TimerInfo myTimer, TraceWriter log)
{
    log.Info($"C# Timer trigger function executing at: {DateTime.Now}");

    RunTest(log);

    log.Info($"C# Timer trigger function completed at: {DateTime.Now}");
}


public static void RunTest(TraceWriter log)
{
    for(int i=0; i< 100; i++)
    {
       log.Info($"C# Timer trigger function executing at thread: {i}");

        Thread.Sleep(1000);

        log.Info($"C# Timer trigger function completed at thread: {i}");
    }
}
Using the Functions –> Integrate section we can configure Input, Output parameters and Schedule Timers, to make it available as a WebAPI methods. You can call this functional logic from another application to invoke as a web API call by passing necessary inputs, to start another functional process.
One example for this scenario would be to invoke a Database record archival call after completion of an order. This is will be applicable in case we choose the scenario WebHook + API during the creation of your functional logic.

That’s all for now for this topic. I will cover more details about WebHook + API in next series.
Please share your comments and rate this article to help me understand areas of improvement.
Additional Refs:
- Create your first function in the Azure portal
- Create a function that runs on a schedule
- Create a function triggered by Storage queue messages
Related Posts
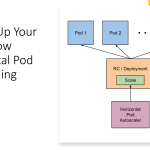 Scaling Up Your Pods: How Horizontal Pod Autoscaling Wins
 Achieving DevOps Harmony: Building and Deploying .NET Applications with AWS Services
 Mastering AWS EKS Deployment with Terraform: A Comprehensive Guide
 Introduction to Site Reliability Engineering (SRE) in Azure: Achieving Higher Reliability with AKS and Essential Tools
- Mastering AWS, EKS, Python, Kubernetes, and Terraform for Monitoring and Observability for SRE: Unveiling the Secrets of Cloud Infrastructure Optimization
- Mastering DevSecOps: Key Metrics and Strategies for Success